Behind the Scenes: How I Create My Prints
Photography Prints My photography process often begins in one of two places
SHOP
Alexandra Martin
8/11/20252 min read


Hello again, and welcome back to the Wiggly Lines Blog — a little corner of dreams, doodles, and creative adventures!
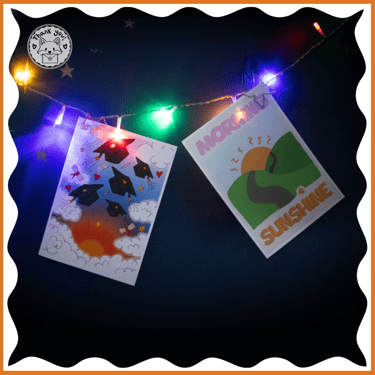
Today, I’m pulling back the curtain to share how I create the prints you see in my shop and online. I work in two main styles: photography prints and illustration prints, each with its own creative process.
Photography Prints My photography process often begins in one of two places: While exploring somewhere new and exciting Or wandering around my hometown of Manchester, camera in hand For most of my shots, I use my trusty Canon D2000 DSLR, a companion I’ve had for almost six years. It’s paired with the Canon 50mm lens, which came bundled with the camera — and despite the years, it still delivers beautiful results. Occasionally, if I spot something magical and don’t have my DSLR with me, I’ll use my iPhone 12. Its camera is fantastic for close-ups, though less ideal for distant subjects (unless it’s something large, like city architecture).
Once I’ve captured my photos, the real work begins back home, I Review all the shots from the day Edit any that need a little extra magic Organise them into folders by theme — such as City, Village, Animals, Light & Dark — with subcategories for easy reference From there, I curate a selection of around ten favourites to list in my shop. Illustration Prints Illustrations begin long before I put pen to tablet. Throughout the day, I jot down little notes whenever an idea pops into my head — no matter how small. Later, when it’s time to create, I go through those notes and pick the ones that spark something in my imagination.
Once I’ve chosen an idea, I set the scene, gather all my drawing tools Stock up on snacks and drinks Wrap myself in blankets so I’m cosy for a long creative session I start with rough sketches, refining them as I go. If someone’s nearby, I’ll often ask them for a quick “first impression” check — because after staring at a drawing for hours, you can lose perspective!
When I’m happy with the design, I Choose my colour palette and save it in Procreate Block in the base colours using the gouache brush Add outlines, followed by shading if needed Once complete, I give the piece a final once-over, make any last adjustments, and then it’s ready to share. I upload it to my shop and announce it on social media, letting everyone know it’s available. This was just a quick overview of my process — I’ll be writing more in-depth blog posts for each type of print soon, complete with photos of my workflow. Thanks for reading, and I hope your day has been as lovely as you are!
P.S. New blog posts will be going up every Monday and Thursday, so stay tuned for more behind-the-scenes peeks and creative musings.


